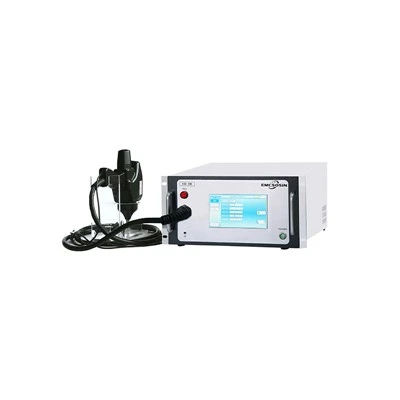

If you’ve ever worked in electronics testing, you know how finicky ESD (electrostatic discharge) can be—one random static zapping a circuit board can take out a whole prototype, no warning. That’s why ESD simulators, like the ones my team designs and supplies, are non-negotiable for testing how products hold up to real-world static shocks. Lately, I’ve gotten a ton of questions: how the heck does a 20kV ESD simulator actually generate that kind of power? It’s not just cranking a dial and calling it done—there’s a method to the chaos, and I walk through it all below.
First, let’s start with the basics. Electrostatic discharge is just a sudden flow of static electricity between two objects at different electrical potentials, right? Like dragging your feet on carpet then touching a doorknob— that spark is low voltage, usually a few kV max, but it’s enough to fry tiny electronics. For industrial or regulatory testing (think ISO 10605 or IEC 61000-4-2), you need a controlled, repeatable discharge—something that mimics real user experiences but is consistent every time. That’s where a 20kV ESD simulator, also known as a 20kV ESD Gun, comes in. If you want to see exactly what that looks like, you can check out our full specs here: 20kV ESD Gun.


Let’s break down the step-by-step process of generating a 20kV ESD. It’s a chain reaction, basically—small power, converted and amplified, stored, then released on demand. I’ll make this as simple as possible, no overcomplicating the circuit jargon.
First up: the low-voltage power supply. Most 20kV simulators run on regular AC or DC input, like 120V wall power or a rechargeable battery pack—nothing fancy. This low voltage feeds into a circuit called a step-up transformer, which does exactly what it sounds like: increases the voltage. But a single transformer can’t get you from 120V to 20,000V in one go, so most simulators use a cascade of small transformers or a voltage multiplier circuit (think of that as stacking tiny voltage boosts) to get the voltage up to the target 20kV. This part is all about safely ramping up the power without blowing out components—we use high-quality insulated capacitors here, because they can handle the huge voltage spikes without breaking down.
Next, the energy storage part. Once we’ve got that 20kV of charge, we need a place to hold it until we’re ready to discharge it on the test device. That’s where a high-voltage capacitor comes in—these are specialized capacitors made to handle extreme voltage, way more than regular capacitors you’d find in a phone. The charge builds up slowly in this capacitor, and we monitor it with a voltage sensor (built right into the simulator gun) to make sure it’s at exactly 20kV before firing. If it’s too low, the discharge is weak; too high, and you risk damaging the test sample or the simulator itself.
Now, the trigger system—this is what makes the simulator useful, not just a big static generator. You can’t have a random 20kV spark going off whenever. We use a solid-state switch (usually a thyristor or a spark gap, depending on the model) that stays closed until you pull the trigger. When you press the trigger, the switch opens for a tiny, precise amount of time (usually a few nanoseconds—super fast) to release all that stored charge. That’s the discharge pulse you see during testing.
Wait, but ESD isn’t just one voltage—there’s rise time and current shape to worry about, right? A real static zap has a fast, sharp rise (like how the spark from carpet is instantaneous) and a specific current decay, so the simulator has to match that. That’s where the discharge network comes in—another set of resistors and capacitors that are tuned to create the exact pulse shape required by testing standards. For 20kV testing, that pulse is usually around 8/20 ns (8 nanoseconds rise time, 20 nanoseconds half-width) for contact discharge, or longer for air discharge where you don’t touch the device directly. That’s why these simulators aren’t one-size-fits-all—our HBM MM ESD Immunity Tester ESD 8K is tailored for different ESD models (Human Body Model and Machine Model, for anyone who’s looked at ESD testing specs) so you get the right pulse for your test.
A lot of people ask: why 20kV specifically? Why not 30kV? Good question. 20kV is the sweet spot for most consumer electronics, automotive parts, and industrial components— it’s high enough to test for worst-case real-world static events, but not so high that it’s overkill for most products. That said, we do make higher-voltage options too, like the 30kV ESD Gun, for applications that need extra testing, like heavy-duty industrial machinery or aerospace parts. But for general testing, 20kV is the workhorse.
But it’s not just the simulator gun itself—you need a proper setup to use it correctly. That’s where an ESD Test Bench comes in. The test bench grounds the device under test (DUT) properly, isolates it from external interference, and lets you control the test parameters (like how many discharges, at what voltage, contact vs air mode) consistently. Without a test bench, your ESD measurements are going to be all over the place—grounding issues alone can throw off the voltage by 20% or more, which is a huge problem for regulatory testing. I’ve seen so many teams waste time on bad test data because they skipped a proper test bench.
Now, let’s talk about some common myths I hear all the time. First myth: “A 20kV ESD simulator is just a big spark generator.” No way— it’s a precision instrument. Every component is calibrated, the voltage is measured to within 1% accuracy, and the pulse shape is tested repeatedly to make sure it meets standards. If you’re buying a cheap off-brand simulator, it might not hit 20kV consistently, or the pulse shape could be wrong, leading to false pass/fail results. That’s why we take calibration super seriously—all our simulators go through a full check before shipping, and we offer annual calibration services to keep them accurate for years.
Another myth: “Contact discharge vs air discharge is the same.” Nope. Contact discharge is when you touch the tip of the simulator directly to the DUT—this gives a sharp, consistent pulse because the circuit is closed immediately. Air discharge is when you hold the tip a few millimeters away and let the spark jump through the air, mimicking when you get close to a device but don’t touch it. For air discharge, the simulator has to account for air pressure and humidity, which can affect how the spark forms— that’s why good simulators have adjustable settings for both modes.
What about safety? You might be thinking: “20kV sounds dangerous— is this thing safe to use?” If you follow basic safety protocols, totally. The discharge pulse is extremely short, so even at 20kV, the total energy is low enough that it won’t hurt a human (though you still don’t want to hold the tip or stand in the direct discharge path). The simulator’s casing is insulated, and all high-voltage components are enclosed so you can’t accidentally touch them during operation. Plus, modern simulators have overvoltage protection so if something goes wrong, they shut down automatically.
Let me walk through a quick example of how this works in practice. Say we’re testing a new smartphone’s charging port for ESD resistance. We grab our 20kV ESD Gun, set it to contact mode, 20kV, place the phone on the ESD Test Bench (which is grounded and connected to our test software), pull the trigger, and zap the port. The simulator’s capacitor releases that stored 20kV charge through the discharge network, creating an 8/20 ns pulse that hits the port exactly like a real static zap from a user’s hand. The test software logs if the phone works after the zap, so we know it’s ready for production. If we didn’t have a proper 20kV simulator, that test would be random—some zaps too weak, some too strong, leading to either missing a defect or wasting money on overengineering.
As a supplier, I’ve seen firsthand how important a good ESD simulator is. A friend of mine works at a small electronics startup, and they tried using a homemade static generator to test their new wearable. They kept getting inconsistent results, so they bought a 20kV ESD Gun from us, and suddenly their test data was rock solid—they found a hidden flaw in the circuit that the homemade generator missed, and fixed it before going to market. That’s the value here: consistent, repeatable testing that saves time, money, and headaches down the line.
If you’re in the market for ESD testing equipment, whether you need a 20kV unit for general testing, a specialized HBM MM ESD Immunity Tester for automotive standards, or a full ESD Test Bench to set up a complete testing lab, we’ve got you covered. Our team has been working with ESD simulators for years, so if you have questions about voltage levels, test setups, or calibration, feel free to reach out to our sales team to talk through your needs.
Before I wrap up, a quick note on standards: all this technology is built to meet international testing standards like IEC 61000-4-2, ISO 10605, and MIL-STD-883, so you can be confident the results from our simulators will be accepted for regulatory compliance. We also offer training for teams that are new to ESD testing, because even the best simulator won’t give good results if you don’t know how to use it right.
References
- International Electrotechnical Commission (IEC). IEC 61000-4-2:2018, Electromagnetic compatibility (EMC) – Part 4-2: Testing and measurement techniques – Electrostatic discharge immunity test. Geneva, Switzerland: IEC, 2018.
- American National Standards Institute (ANSI). ISO 10605:2018, Road vehicles – Test methods for electrical disturbances from electrostatic discharge. Geneva, Switzerland: International Organization for Standardization, 2018.
- Microman, S. “ESD Simulator Technology: A Review of Design and Calibration.” Journal of Electrostatics, vol. 97, 2019, pp. 45-52.
- Tektronix Application Note. “Understanding ESD Test Pulse Parameters and Measurement.” Beaverton, OR: Tektronix, Inc., 2021.